those of you who know me well may need some CPR after reading the title of this post. but, it's true. i crafted. once. all on my own. and it turned out. more CPR anyone?
my math major tendencies do not lend themselves easily or often to crafting pursuits. but every once and a while i get inspired. it only takes me about 4 months to finish a weekend craft, but i'll take what i can get.
after a friend posted this picture to
her blog
i started thinking that i might be able to make something like this on my own... AND I DID!!! so here it is, my way-to-many-details-step-by-step-guide to making your own "word art"
1) head to lowes or home depot and steal scrap pieces of wood from their trash cans (this is what i did, but i'm sure they will also allow you to purchase your wood)
2) sand, baby, sand. i was able to borrow a hand sander from a friend and if you are doing a large project i would highly recommend one. i sanded using several different grits of paper, rough to smooth. probably a better way to do this, but i craft to the beat of my own drum. oh, and no picture. like i said, i don't do this often so i forgot to photograph each step :)
3) prime. and from what i've read, this step is I.M.P.O.R.T.A.N.T. helps the paint stick and stuff. i used zinsser bulls eye 1-2-3 primer cause i had it... and i read that it's the best. seems to have worked well for this project. i used a foam brush. why? cause i had one. i'm sure a regular brush would work well too, but i like that the foam brush is less streak-y.
4) let the primer do it's thang for 7 days. why? cause it says so. and i'm a rules follower.
5) let the painting begin! i wanted black letters on a white surface, but obviously you can chose the colors that make your heart happy. all in all, i probably did 2 (maybe 3?) coats. again, no picture. but i'm guessing you all know what white paint looks like.
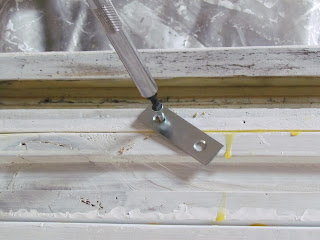
6) break out the power tools! ok, all you really need is a drill, but it still plugs in and makes a lot of noise, so let's call it a power tool. lay out your wood so that it's arranged the way you want it to look. i had 8 pieces, all different sizes and lengths so i decided to highlight that by not making them all line up flush on one side, but rather went with the "random" layout look. i used 2" mending plates, wood nails, and wood glue to bind all my wood together. there are at least 2 mending plates for each set of two pieces of wood, some sets required 3.

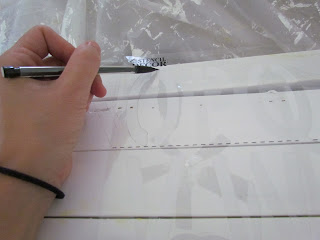
7) i glued all the wood together first and then attached the mending plates. but in hindsight, i would have been a little more careful with the glue--> several of my pieces were curved so after the glue dried i could see the glue in the cracks. if i were to redo it, i'd be a little more strategic about where i used the glue. after the glue dries, secure each piece with the mending plates- mark where you want to drill a screw, use your drill to create a hole then screw that screw!
8) once everything is secured, you now have your "canvas" for your art. i don't draw. but i can trace a letter with the best of them. so i googled "love quotes", found my favorite, bought a set of stencils from michaels and painstakingly traced out each letter of that quote.
9) paint. again. i had black tempra paint, so that's what i used. now that it's dried it's a little cracked- but i actually like that look. i used a small artist paintbrush for this.
10) convince your husband that you need help hanging this sucker. it's heavy. we used the experts at home depot to guide us in what we needed to hang it. we used
these picture hangers that can hold up to 50 lbs. each. something this heavy should be mounted into the studs in your wall- which is ok since you are deciding where the hooks get placed on the back of your art. so 1) find the studs in your wall, 2) measure the distance between, 3) attach whatever hooks you use that distance apart on the back of your wood, 4) secure the mount to the studs (at the height you want your art), 5) hang the art and hope it stays!!!
11) please ignore the rest of that corner... it's a corner that needed to be filled and i used what i had. my house = always a work in progress.
so there you have it, my craftiness. obviously this project can be done a million different ways, for a million different inspirations. but hopefully this math-major's craftiness will inspire your inner crafter to do great things!!!
COST BREAK DOWN:
wood: free
hand sander: free
sand paper: about $3.50
primer: had it already, but a 1 quart can costs $9.47
paint: had it already, but a 1 quart can costs $14.00
foam brush: had it already, but a 2" brush costs $0.67
mending plates: i used 5 packs of 4, each pack costs $2.48
wood screws: i used 2 packs of 16, each pack costs $0.98
stencil: $10
tempra paint: had it already, but 1 bottle costs $1.77
picture hanger: i used 2, $0.97 for a pack of 3
TOTAL COST: $28.83
HELPFUL HINTS
1) if your wood is curved be aware of where you use the glue, and where you place the mending plates. try to imagine where the "gaps" will be so that you do not see either of these when your wood is hung
2) try to use the paint you already have- be creative so that your budget can thank you!


